ConnectYourGPT / Claude, screen by screen
ConnectYourGPT in Claude, screen by screen.
Each step with its screenshot, for anyone who prefers to see it before doing it. The short version is in the Claude guide.
Screenshots from November 2, 2026 (the permission screen, from November 3), all in Spanish, including our own dashboard, which you’ll see in English. In Claude and ChatGPT the button names in the text are our translation: yours may differ, so look for the one in the same place. Names and the QR code are examples, and phone numbers are covered. These AIs change their menus from time to time: if something doesn’t match, look for the button that does the same thing.
First: your account and your WhatsApp
Create your account
Go to connectyourgpt
.com/ registro from a computer or tablet. Read the notice and tick the box: the form to create your account with your email or with Google then appears. 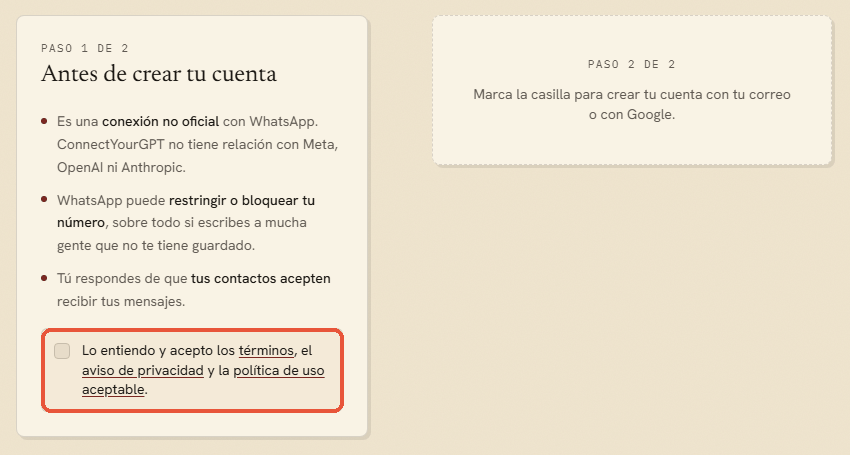
The first step of signing up: the notice and the box. Open the WhatsApp screen
In the dashboard, go to WhatsApp and click Show the QR code.
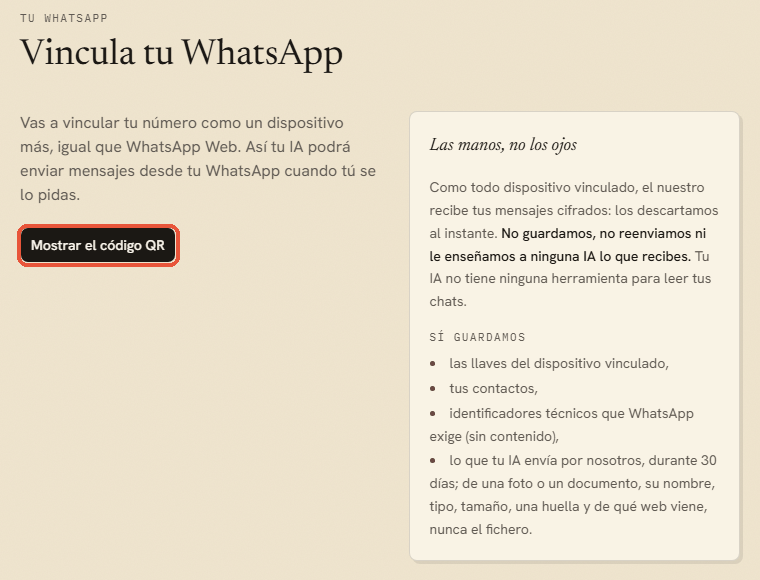
Before linking, the screen explains what is stored and what is not. Scan the code with your phone
On your phone: WhatsApp → Linked devices → Link a device, and point the camera at the code on your screen. It’s like opening WhatsApp Web.
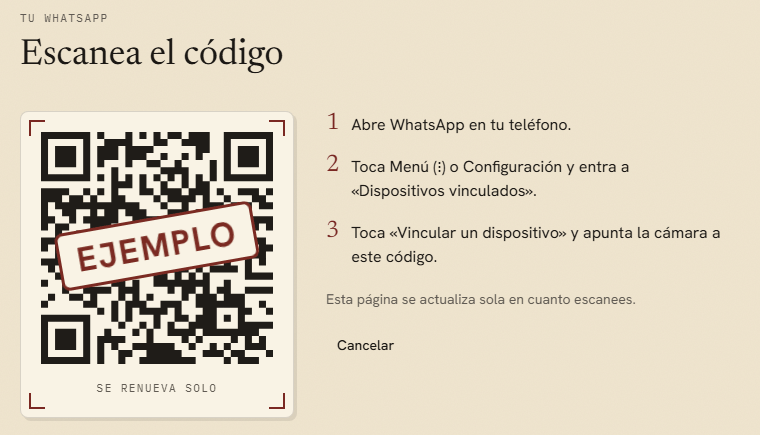
The code in this image is an example: yours appears in your dashboard and renews itself. Your number shows as connected
The page updates by itself as soon as you scan. You can now connect your AI.
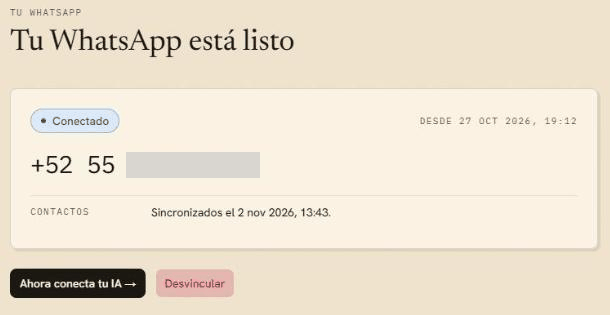
Your WhatsApp, linked. Your number appears here; in the image it’s covered.
In Claude
The free plan allows one custom connector: if you already have another, you’ll need to remove it to add ConnectYourGPT. In Claude for work (Team or Enterprise) the steps are different: they’re in the Claude guide.
Open the customization section
In claude.ai, click Customize in the sidebar.
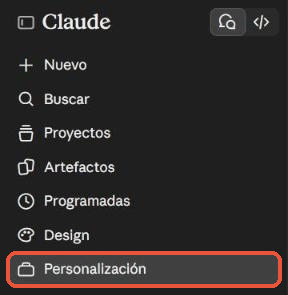
Claude’s sidebar, with the customization item highlighted. Add a custom connector
Go to Connectors, click + Add at the top right and choose Add custom connector.

Connectors, the add button and its open menu. Type the name and the address
For the name, type ConnectYourGPT. In the field for the MCP server URL, paste
https://. Click Continue.api .connectyourgpt .com/ mcp 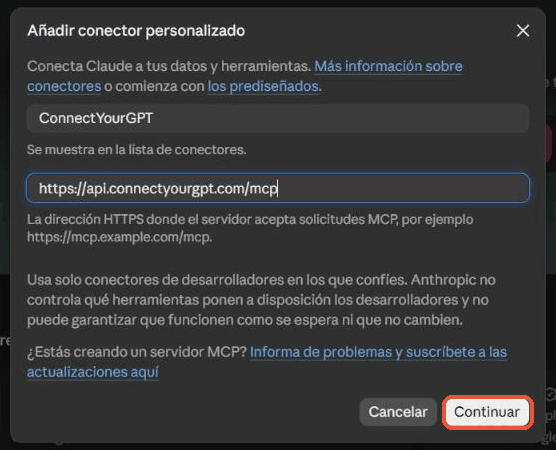
The form filled in, before clicking continue. Leave the sign-in method as it is
Claude checks the server and selects by itself sign in now and register automatically, both labeled as detected. Don’t change anything: scroll to the end and click Add.
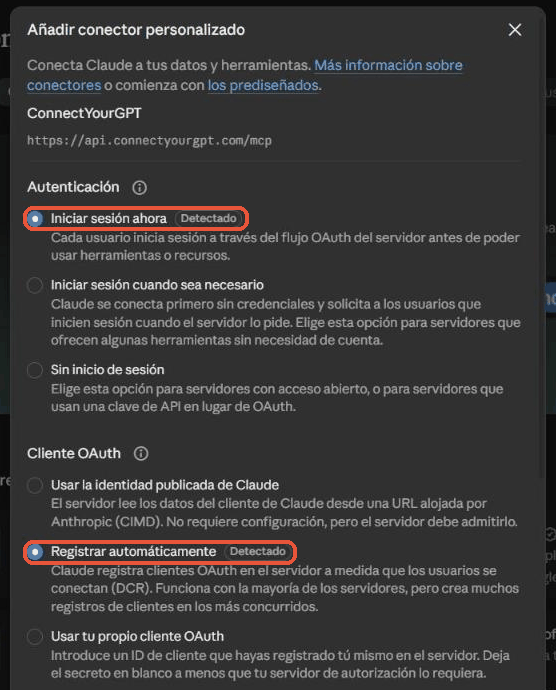
The two options Claude selects by itself. 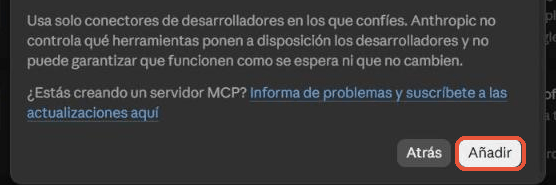
The add button, at the end of the same window. Give permission
Claude takes you to the ConnectYourGPT permission screen. If asked, sign in with your account. Read what it will be able to do and what it never will, check that the permission goes to
claude.aiand click Allow.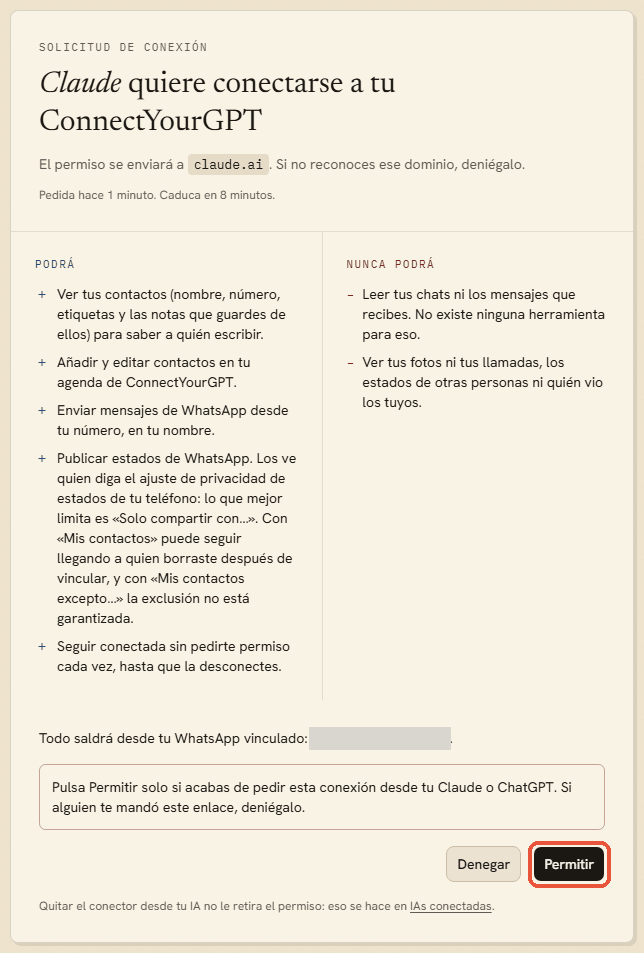
The permission screen: what Claude will be able to do, what it never will, and where the permission goes. Check that it’s connected
Back in Claude, under Connectors, in the tab with your own connectors, ConnectYourGPT shows a check mark.

The connector in the list, with its check mark. Ask for your first message
Open a chat and ask, for example: “Text Ana Ruiz that the appointment is tomorrow at 10.” Claude shows you who and what, and waits for your yes.
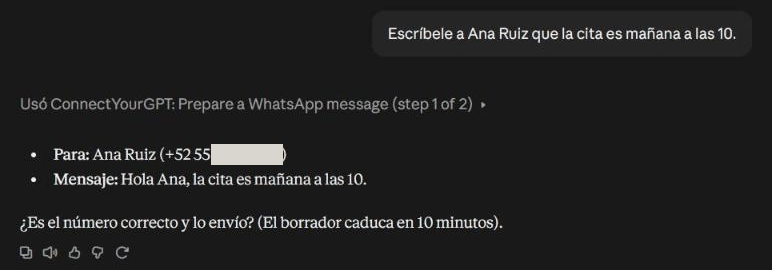
The draft: recipient, phone number and message, not sent yet. Say yes and allow the send
Answer “Yes.” ConnectYourGPT can’t check that yes: it only asks Claude for it. When it sends, Claude also asks whether to allow it once or always. Once is the most careful choice: it will ask again next time.
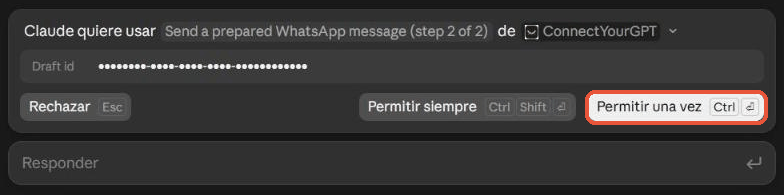
Claude’s question before sending. See what it tells you
“Sent” means WhatsApp accepted it, not yet that it reached the phone. If you want to know, ask Claude a little later.
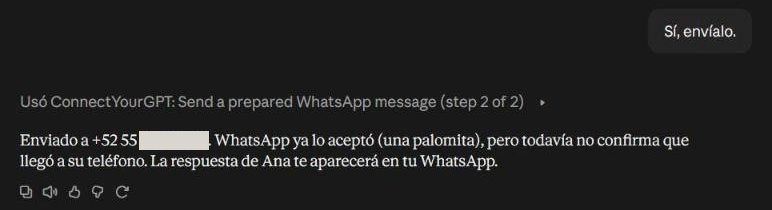
The answer after sending: accepted by WhatsApp, delivery not confirmed yet.
If something isn’t working
Claude says a connector with this URL already exists
You’ve already added it, perhaps under another name. Look for it in Customize → Connectors, in the tab with your own connectors. If it shows Connect next to it, click that and give permission.
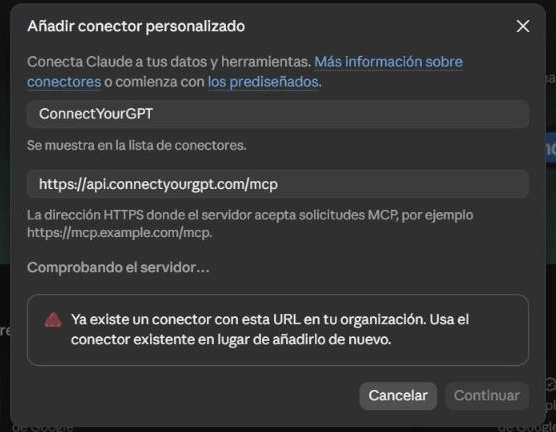
Claude’s notice when the address has already been added.
If you change your mind
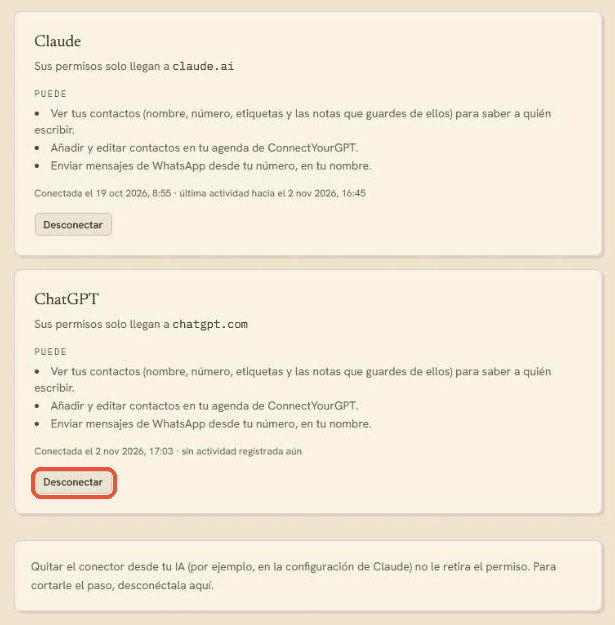
In the ConnectYourGPT dashboard, under Connected AIs, you see each AI that has permission. To cut it off, click Disconnect and confirm. From that moment it can’t use any tool. Removing the connector only in your AI doesn’t withdraw its permission.